Laminate flooring is a popular choice of material for home because it is durable and scratch-resistant, available in various colors and designs. However, that doesn’t mean it can’t be damaged. Moisture impacts from sharp objects and improper installation can cause imperfections in your floor. Without proper maintenance, laminate floors look worn, old, and unwelcoming. You can repair the flaws and hide the scratches when these damages are present. Don’t worry, and you can usually do the fix. Here’s a guide to repairing damaged laminate flooring.
Tools and Materials
Tools
- Clean cloth
- Protective gloves
- Putty knife or trowel
- Pry bar or chisel
- Plier
Materials
- Replacement laminate planks (matching the existing flooring)
- Utility knife or laminate flooring cutter
- Wood glue
Step-by-step instructions
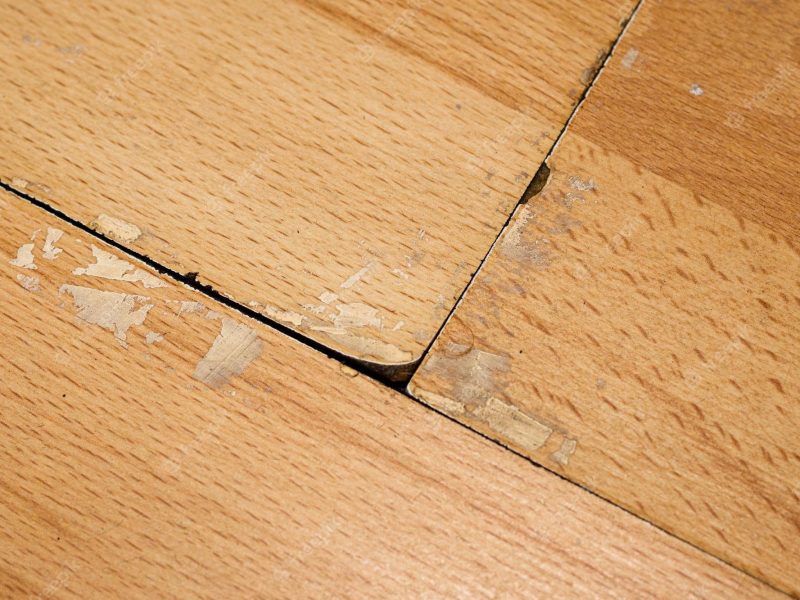
1. Assess the damage
Identify the damaged area of the laminate flooring. Determine if it’s a small section or requires replacing an entire plank.
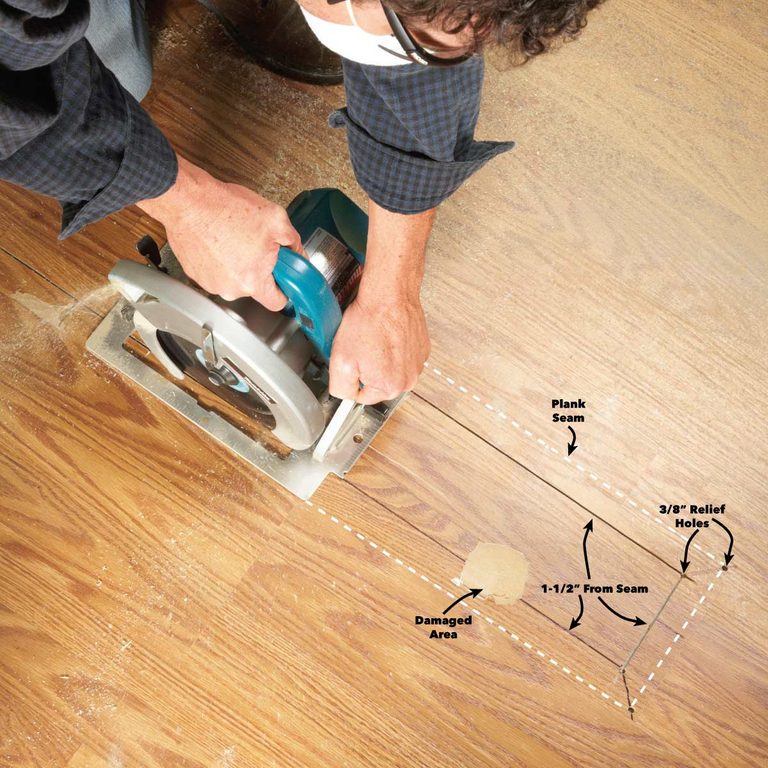
2. Remove the damaged plank
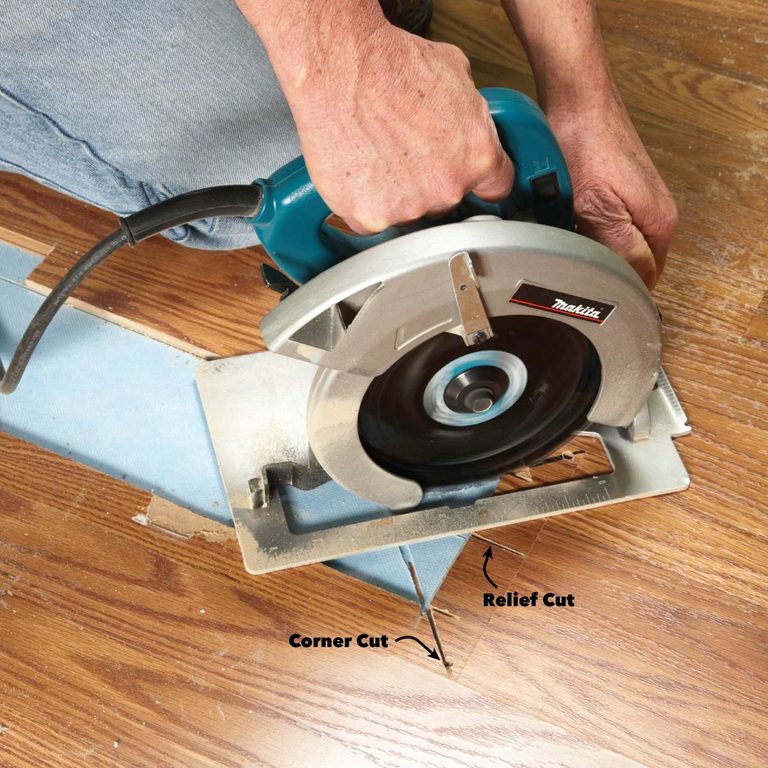
- If you need to replace an entire plank, remove the damaged one.
- Use a pry bar or chisel to lift the damaged plank’s edges carefully.
- Gently pull the plank up and away from the surrounding planks.
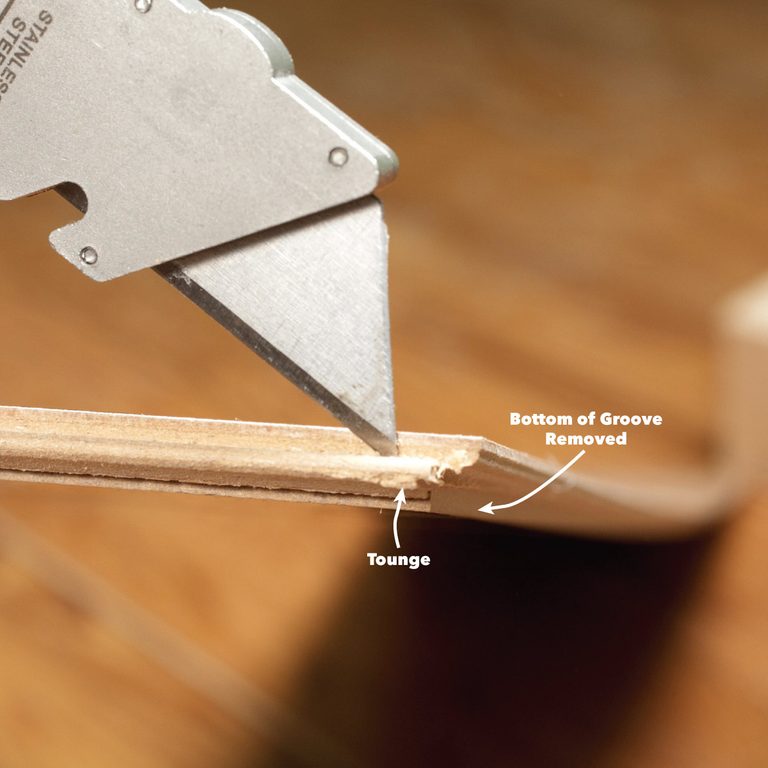
3. Prepare the replacement plank
- Measure and cut the replacement plank to fit the space left by the removed plank.
- Use a utility knife or laminate flooring cutter to make precise cuts. Ensure the new plank matches the dimensions of the removed plank.
4. Apply wood glue
- Apply a thin layer of wood glue to the underside of the replacement plank and along the edges of the surrounding planks.
- Be cautious not to apply excessive glue, as it can squeeze out and create a mess.
5. Install the replacement plank
- Carefully insert the replacement plank into the space, aligning the edges with the surrounding planks.
- Press the plank down firmly to ensure it adheres to the glued surface.
6. Remove excess glue
- Wipe away any excess glue that may have squeezed out during installation.
- Use a clean cloth or putty knife to remove the glue before it dries.
7. Allow for drying
- Give the repaired area sufficient time to allow the wood glue to dry and bond the replacement plank to the surrounding planks.
- Follow the manufacturer’s instructions for the recommended drying time.
8. Clean and inspect
- Clean the repaired area once the glue has dried to remove any remaining residue or marks.
- Inspect the repaired section to ensure it is level and blends seamlessly with the rest of the flooring.
If you’re repairing minor damage, such as scratches or chips, you can use laminate floor repair kits that include color-matched filler. Follow the instructions provided with the repair kit to fill and smooth the damaged area.
It’s important to note that laminate flooring can have limitations regarding repairs. Severe damage, such as water damage or extensive wear, may require professional assistance or replacement of larger sections of the flooring. If everything up to this point makes it difficult for you, you can easily contact us. We will help!
Regular maintenance, such as proper cleaning and avoiding excessive moisture, can help prevent damage to your laminate flooring and prolong its lifespan.
Comments
[…] Please find more articles about laminate flooring here:9 Steps for Installing Laminate Flooring by YourselfHow to Make Laminate Floor ShineRepairing Chipped Laminate FlooringHow to Repair Damaged Laminate Flooring […]