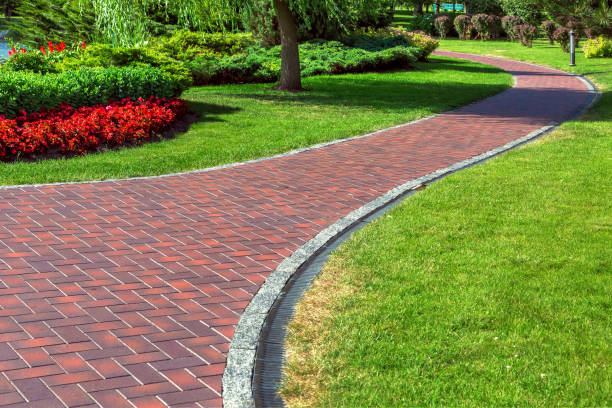
A brick walkway is a perfect complement to your home’s exterior by giving it a classic and gorgeous look and being a welcome way to welcome visitors and residents. This magnificent addition to your home’s exterior won’t blow your budget or call in a landscape professional. The work is not particularly complicated, and careful preparation will ensure a beautiful and long-lasting job. Brick walks have been known to last for more than a hundred years. Here are some guidelines for laying a brick walkway by yourself.
Benefits & Basic Elements of Brick Walkway
Benefits
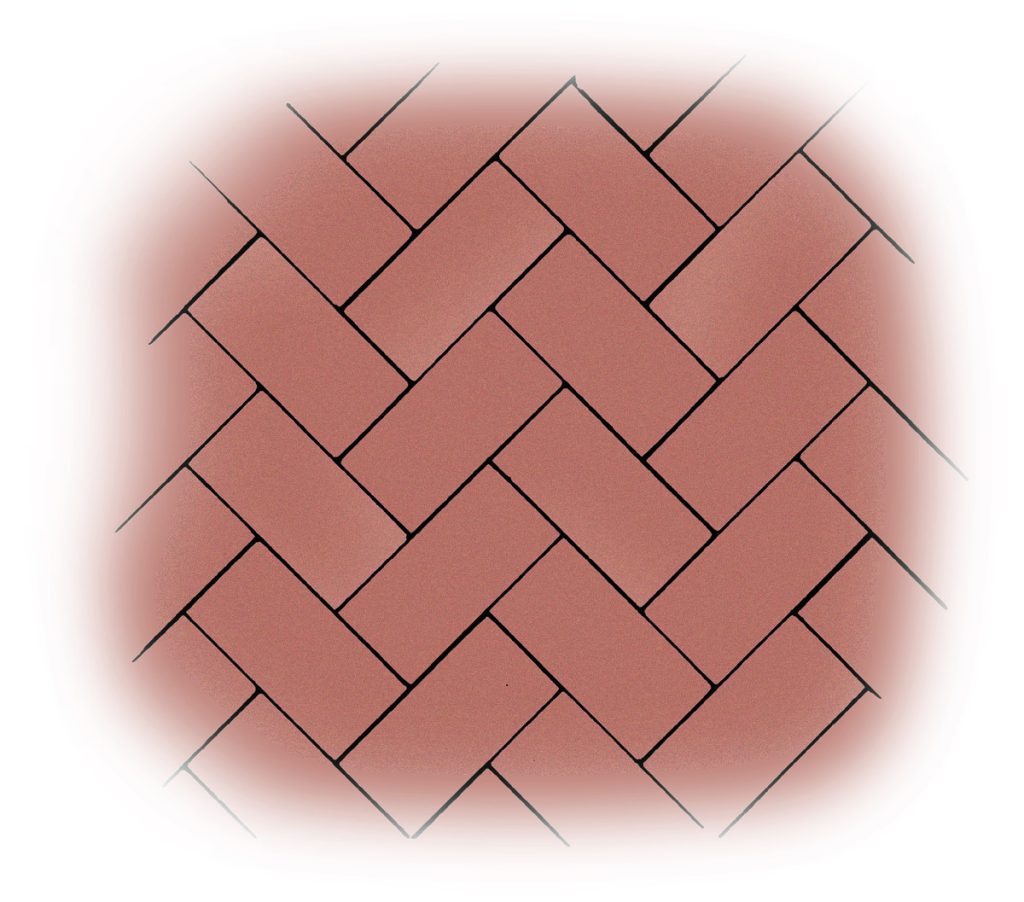
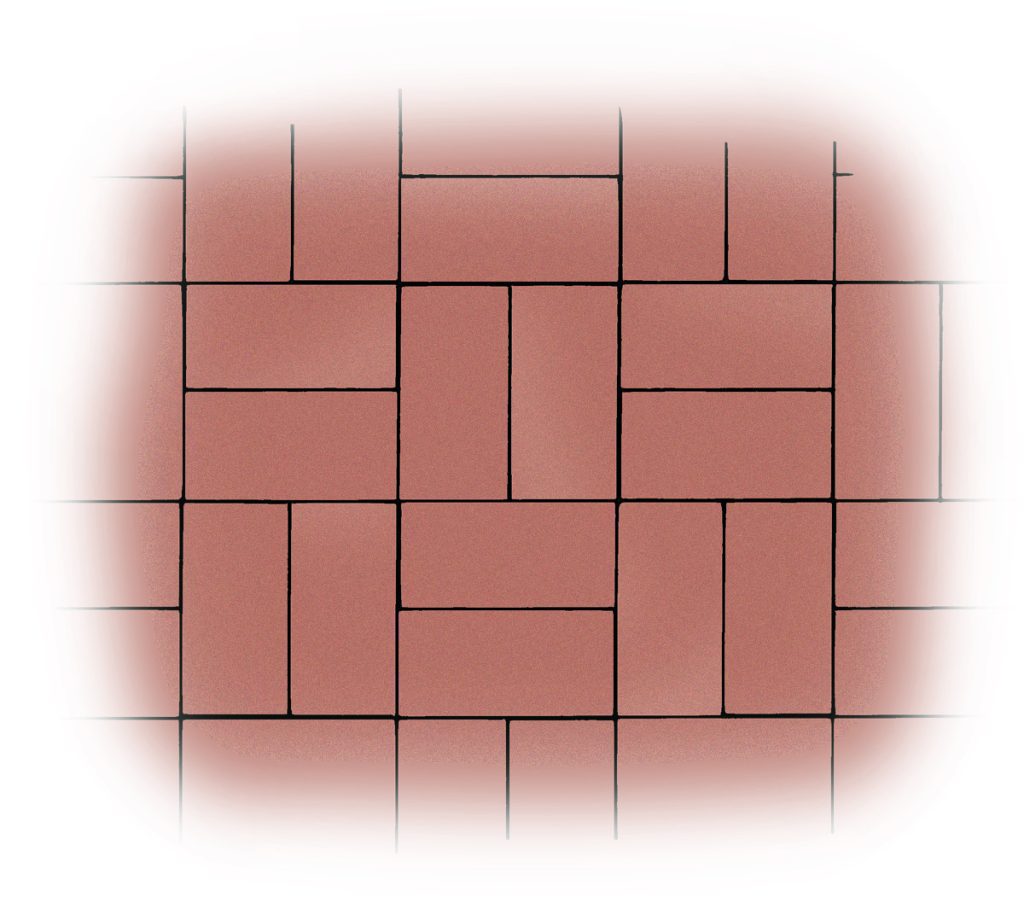
- Aesthetic: There are a variety of styles, letting you create the look as simple or complex as you want. They are also available in more colors than poured concrete.
- Durability: Bricks walkways have an extremely low tendency to get cracked and are resistant to weathering and scratches. They are also suited for a wide variety of landscaping applications. Not only do they last longer than anything else available in the market, but they also work better than concrete and hold color longer.
- Low maintenance: Brick walkways do not require very much maintenance and can last for decades with just a little bit of upkeep.
- Non-slip surface: Brick walkways have a surface that is naturally textured and therefore helps against slipping or skidding. Due to their high-level abrasive characteristics, they are generally preferred in areas with heavy rain or snowfall.
- Eco-friendly alternative: Manufactured using organic clay material obtained from the soil.
Basic Elements
- Gravel: About 3-4 inches of gravel at the bottom is smoothed and tamped down to create a base.
- Sand: About 2 inches of sand on top of the gravel is screened flat to help the bricks rest flat and level.
- Bricks: Bricks are laid on top of the sand. After the bricks are down, sand is swept over them to hold them in place.
Tools and Materials You’ll Need
Tools:
- Level
- Protective gloves and safety glasses
- Rubber mallet
- Shovel or garden trowel
Materials:
- Bricks
- Sand
- Gravel or crushed stone
- Tamper or hand compactor
- Jointing sand
- String and stakes
- Masonry saw or chisel and hammer (for cutting bricks)
Step-by-step instructions
1. Plan your walkway
- Determine the desired path and dimensions for your walkway.
- Mark the edges of the walkway using stakes and string.
2. Prepare the base
- Remove any existing grass or vegetation from the area.
- Dig a trench along the marked path, ensuring a depth of about 4-6 inches (10-15 cm).
- Create a slight slope of 1/4 inch per foot (2 cm per meter) away from any structures to ensure proper water drainage.
- Compact the soil in the trench using a tamper or hand compactor.
3. Add a base layer
- Fill the trench with a gravel or crushed stone layer, about 2-3 inches (5-8 cm) deep.
- Compact the base layer with a tamper to ensure stability and prevent shifting.
4. Add a layer of sand
- Spread a layer of sand over the compacted base layer, about 1 inch (2.5 cm) deep.
- Smooth and level the sand using a garden trowel or straight board.
- Check the level frequently to ensure an even surface.
5. Start laying the bricks

- Begin at one end of the walkway and lay the first row of bricks along the edge of the trench.
- Tap the bricks into place using a rubber mallet to ensure they are level and aligned with the string guide.
6. Continue laying the bricks
- Lay the subsequent rows of bricks, staggering the joints (like a brick wall) for added stability.
- As you lay each brick, press it firmly into the sand bed and tap it with the rubber mallet to ensure a secure fit.
7. Cut bricks as needed
- If necessary, cut bricks to fit the desired shape of the walkway.
- Use a masonry saw or a chisel and hammer to make precise cuts.
- Always wear protective gloves and safety glasses when cutting bricks.
8. Fill the joints
- Once all the bricks are laid, fill the joints with jointing sand.
- Spread the sand over the bricks and sweep it into the joints using a broom.
- Continue adding sand and sweeping until the joints are filled.
9. Compact the bricks
Use a tamper to gently compact the bricks, ensuring they settle into the sand and create a solid surface.
10. Clean up
Sweep away any excess sand from the surface of the bricks.
Your brick walkway is now complete! Over time, you may need to refill the joints with additional sand as it settles. Regular maintenance, such as sweeping and occasional resealing, will help prolong the life and appearance of your walkway. If you need an expert to do it, you can contact us.
Comments