9 Ultimate Guides to Installing In-Ground Sprinkle System for Beginners
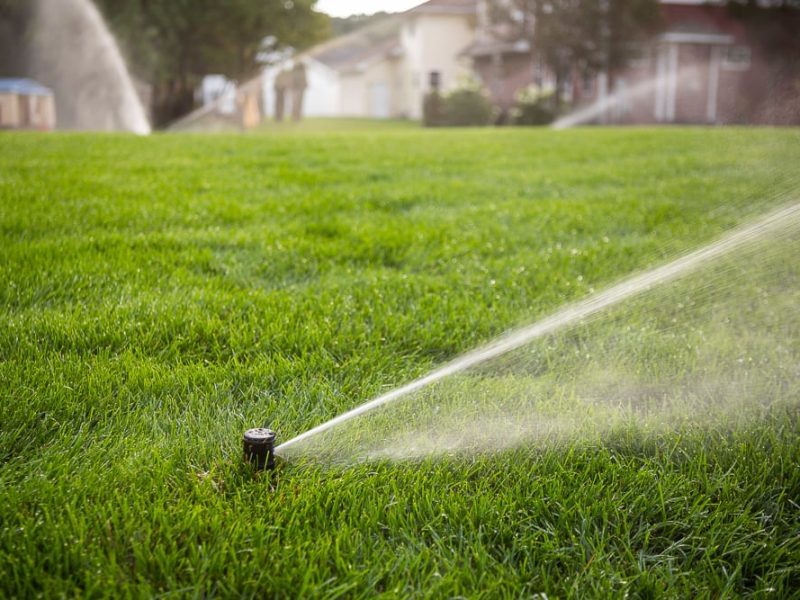
You don’t have to spend much time watering your water lawn. Moving a lawn sprinkler from point A to point B or walking around with a hose in your hands doesn’t always do the job effectively. Even water is wasted quite a lot and not efficiently. Installing an in-ground sprinkler system for your lawn or garden can provide efficient and convenient watering. In addition, in-ground lawn sprinklers deliver a precise amount of water, then automatically shut off and drop out of sight. Here’s a guide to installing an in-ground sprinkle system by yourself.
Tools and Materials You’ll Need
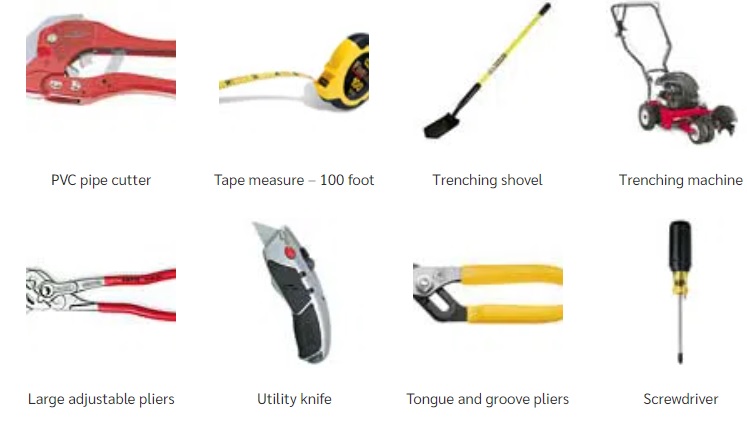
Tools
- Shovel or trenching tool
- Pipe cutter or hacksaw
- Plier
- Pipe clamps or stakes
- PVC glue
- Screwdriver
Materials
- Sprinkler heads
- Sprinkle time (optional)
- PVC pipes (mainline and lateral pipes)
- PVC fittings (elbows, tees, couplings, etc.)
- Backflow preventer (check local codes and regulations)
- Teflon tape
- Solvent cleaner (if using PVC glue)
- Valve box
Step-by-step instructions
1. Plan your system
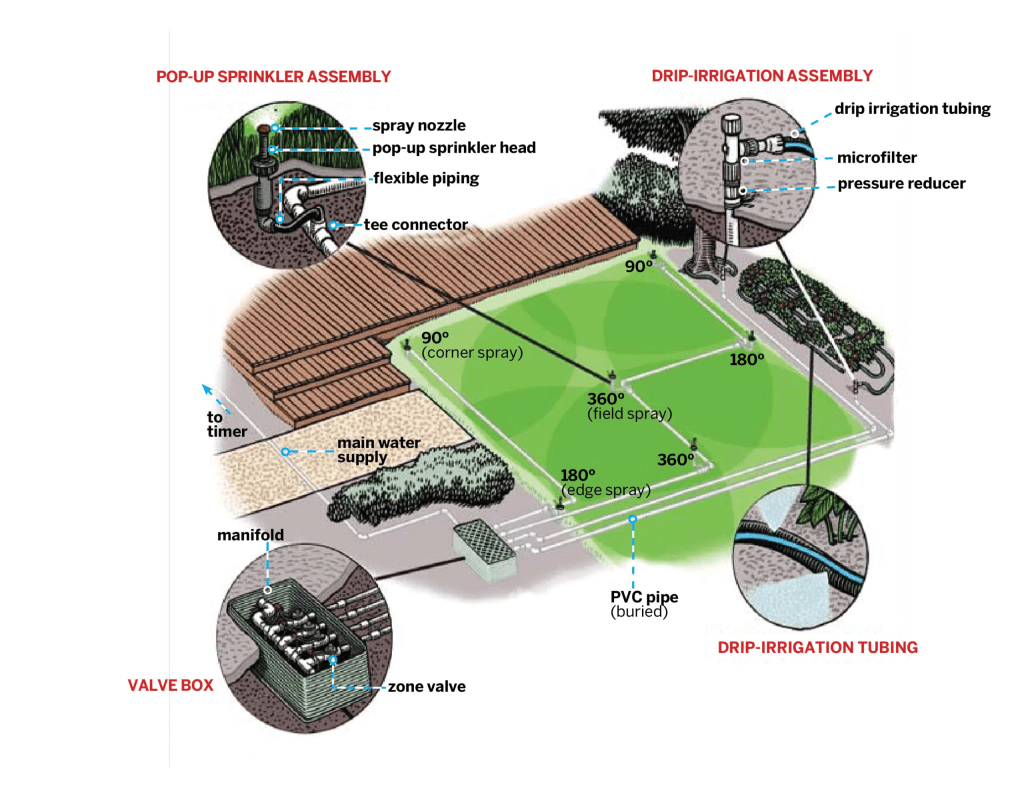
- Determine the area you want to cover with the sprinkler system and assess the water needs of your lawn or garden.
- Map out the locations where you want to place the sprinkler heads, ensuring they provide adequate coverage with minimal overlap.
- Consider the water pressure and flow rate available from your water source. This will help determine the number of zones you’ll need and the sprinkler head types you can use.
2. Prepare the area
- Mark the locations for the sprinkler heads and the mainline and lateral pipes route.
- Use a shovel or trenching tool to dig trenches along the marked route. The depth will depend on the frost line and the type of pipe used.
3. Install the mainline
- Begin by connecting the mainline pipe to the water source. Use appropriate fittings, such as elbows and tees, to navigate around obstacles.
- Cut the mainline pipe to the desired length using a pipe cutter or hacksaw.
- Clean the pipe and fittings using a solvent cleaner if using PVC glue.
- Apply PVC glue to the pipe and fittings, following the manufacturer’s instructions. Use Teflon tape on threaded connections for a watertight seal.
- Lay the mainline pipe in the trench and secure it with pipe clamps or stakes to keep it in place.
4. Install the lateral pipes
- Determine the locations where the lateral pipes will connect to the mainline. Use elbows or tees to make the connections.
- Cut the lateral pipes to the desired length and glue them to the fittings, ensuring proper alignment.
- Lay the lateral pipes in the trenches, keeping them level and at the appropriate depth. Secure them with clamps or stakes.
5. Install the sprinkler heads
- Install a riser at each desired sprinkler location by attaching a riser pipe to a tee or elbow fitting on the lateral pipe.
- Attach the sprinkler head to the top of the riser pipe, following the manufacturer’s instructions.
- Ensure the sprinkler heads are at the correct height to provide optimal coverage.
6. Connect the system to the water source
- If local codes and regulations require it, install a backflow preventer to prevent water supply contamination.
- Connect the main line to the water source using an appropriate valve assembly. This may include ball valves or automatic control valves.
- Use PVC glue and Teflon tape to ensure secure and watertight connections.
7. Install a valve box
Place a valve box over each valve or control assembly for easy access and protection from the elements. Dig a hole for the valve box and ensure it sits flush with the ground.
8. Test the system
- Turn on the water supply and test each sprinkler system zone separately.
- Check for any leaks or areas with inadequate coverage. Make adjustments as needed, such as tightening connections or repositioning sprinkler heads.
- Verify that the system operates as expected, with proper timing and coverage.
9. Install a timer (optional)
- To automate your sprinkler system, consider installing a timer. Timers allow you to set specific watering schedules for each zone, ensuring efficient water usage.
- Follow the manufacturer’s instructions to install and program the timer according to your preferences.
Always ensure your safety and follow local plumbing and building codes when working with in-ground sprinkler system installations. If you’re unsure about any aspect of the installation, it’s best to consult a professional or irrigation specialist for guidance.
Comments